-Guest blog post by Emma Martone, Curator of the Mariana H. Qubein Arboretum and Botanical Gardens
Starting this week, 15 seed starting kits will be available to patrons of the HPU Seed Library on a first-come, first-serve basis.
If you have ever sprouted a bean in a cup or sown a row of lettuce, you know how rewarding it is to grow something from seed. Most seeds appear round, brown, and unassuming, but within each is the potential for life. All seeds contain the tiny embryo of a plant, a bit of food to help them grow, and an outer shell called the seed coat that offers protection while the seed lays in wait for the right time to germinate.

For most plants we grow from seed, germination is reassuringly predictable. A radish seed may sprout in as little as 3 days and tomatoes can be expected in about a week. This is because, when humans first began domesticating plants, early farmers and gardeners selected desirable traits such as fruit size, flavor, ripening time, as well as predictable germination. Predictability ensured that as long as crops were planted at the right time, they sprouted quickly and reliably, the first step to a bountiful harvest.
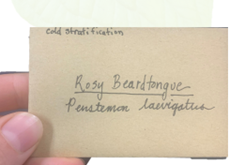
However, for the wild plants that reproduce without human intervention, germinating at the right time is the key to survival. If a seed germinates in the dead of winter or in the middle of a drought, it’s not likely to make it. Though most seeds ripen and fall to the ground in autumn or winter, they must lie in wait until the spring when warm spring temperatures and abundant rainfall will allow them to grow. But how do they know when the right time has come? Many wild plant seeds require specific environmental cues to germinate. For example, exposure to cold and moisture, a condition called stratification, helps ensure that seeds germinate only after winter has passed. Other seeds won’t germinate until their seed coats have broken down, a process called scarification, which allows water to penetrate into the seed. In nature, scarification happens naturally when seeds are exposed to winter elements, or a lot of time has passed. This is another signal that helps a seed know when spring has arrived. Other seeds need exposure to light, exposure to fire, or prolonged dormancy before germinating. Many wild plants also produce a large quantity of seed, which allows them to build up seeds in the soil, called a seed bank. This strategy ensures that even in poor sprouting years, seeds remain in reserve for future growth.
To grow wildflowers, it’s important to understand that the seeds of these plants will often take longer to germinate than other seeds, and they will need exposure to moisture, cold, or other conditions to help them germinate. Though it can take a bit more work, growing these beautiful native plants is well worth it!

This take-home activity will help you to germinate seeds successfully!
Step 1: Choose your seeds
- Select the seeds you’d like to grow and check the seed packet to see if it requires ‘scarification’, ‘stratification’, or ‘no-pretreatment’
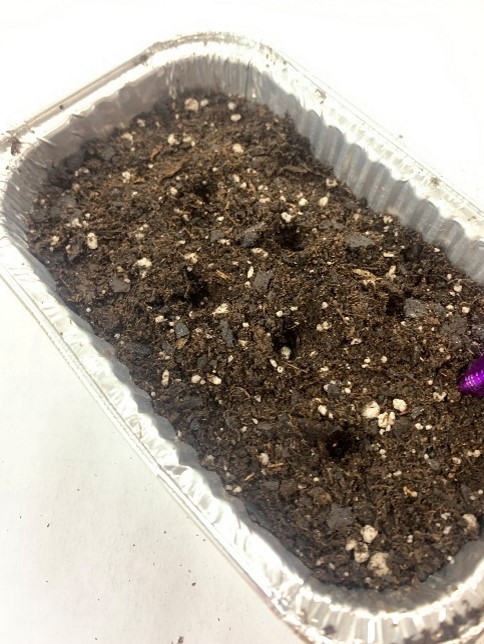
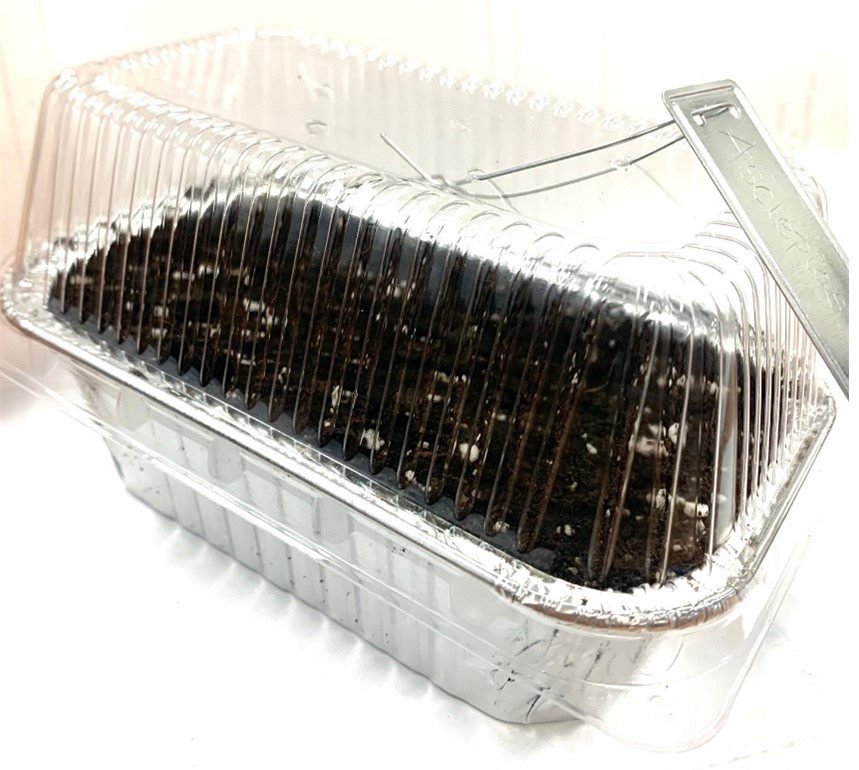
Step 2: Prepare the soil mix
- Fill the baking trays with damp soil
- Using the palm of your hand, firm the soil mix surface so that it is smooth and flat.

Step 3: Sow your seed
- If your seed requires scarification, use 2 pieces of sandpaper to rub the seeds so that the seed coat is roughed up. You should be able to see or feel that the seedcoat is no longer perfectly smooth.
- If your seeds are larger than the head of a pin, use a pencil or your finger to make a small hole for the seed, then cover them with soil. If your seeds are small, simply press them into the soil.

Step 4: Wait for spring
- Mist the seeds trays with water to moisten the soil, then set the tops on the trays and set them outside for the fall and winter. Pick a location in part sun or dappled shade and elevate your seed trays off the ground to protect from pests. Check on your seeds every few weeks to make sure the soil medium is still moist.
- Don’t forget to label your trays with type of seed and date planted!
Step 5: Germination
- Wild seed germination can be slow and sporadic. Be patient! After seedlings have germinated and have at least 3-4 leaves, they need to be transplanted to separate pots so they have room to continue growing.
Step 6: Transplanting:
- Fill a pot with potting soil and pack the soil.
- Make a small hole for your seedlings.
- Use the tongue depressor to dig up the seedlings from the tray, being careful to keep the root systems intact, and leaving some soil on the roots if possible.
- Place the seedling in the hole so that the plant ends up at the same level as it was in the original pot (you do not want to bury the stem too deeply, nor do you want roots exposed). Tamp down the soil so that the seedling doesn’t flop over.
- Water deeply and allow your plant to continue to grow. When the roots seem to fill the pot and the plant shows active growth, it can be planted into the ground. This will likely be in mid spring.
Note: Though many wildflowers take 2 years to fully establish and flower, they will reward you with beauty and biodiversity. Happy growing!
Librarians’ note: While you wait for your seeds to germinate, you can learn more about seed starting and seed libraries from the following HPU Library eBooks: